Logging into MOGON
How to set up SSH on your machine
Background Information
To establish a secure connection through which we can access MOGON on our local computer, the Secure Shell (SSH) protocol comes into play. The central aspect of SSH is a pair of cryptographically generated keys—a public and a private key.
As the name suggests, you can share your public key without concern—feel free to tell it to your neighbor. On the other hand, you should always keep your private key secret! While the public key can be transferred to MOGON through a potentially unsafe network, the private key will never leave its place. Even during authentication it stays on your local machine.
How do these keys help with authentication? Well, the public key can encrypt a message that only your matching private key can decrypt. So, imagine MOGON sends you a message that has been encrypted using your own public key. You can now prove your identity just by decrypting it! After all, you are the only person in the world that has the matching private key.
You can connect to MOGON without studying cryptography, though. Just follow the steps described below.
Generating SSH Keys on Linux/macOS
Generating an SSH key pair can be as easy as executing the following command in your terminal:
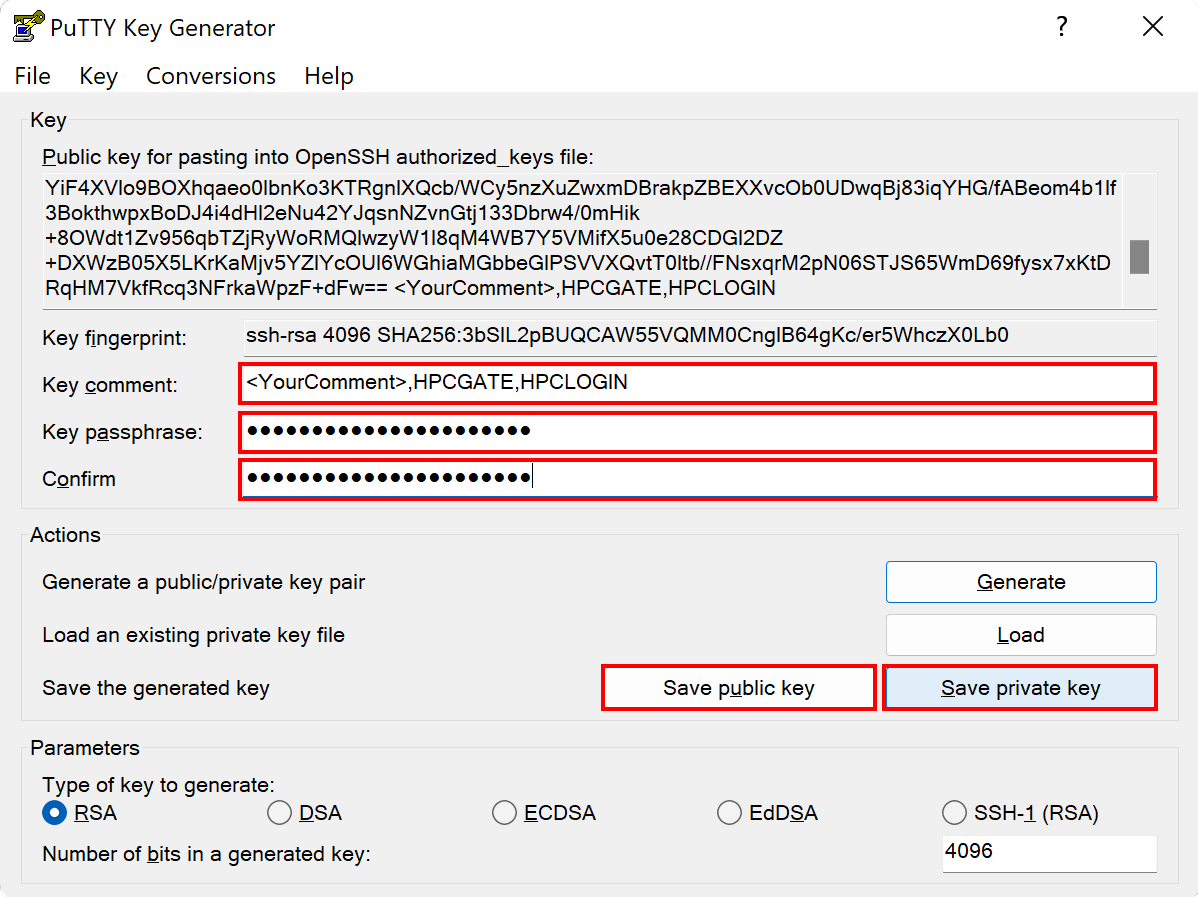
ssh-keygen -t rsa -b 4096 -C "HPCGATE,HPCLOGIN"
This generates a new key pair of type RSA and 4096 bit key size. The comment "HPCGATE,HPCLOGIN" is mandatory and lets our webtool in a later step know where to put your public key.
Next, ssh-keygen prompts you to enter a name for the key files.
Enter a file in which to save the key (/home/you/.ssh/id_rsa): [Press enter]
You can press enter to confirm the default or provide an alternative. A meaningful name might be /home/<user>/.ssh/id_rsa_mogon_laptop.
After that you have to specify a passphrase—use a passphrase! An empty passphrase is a serious security concern.
Enter passphrase (empty for no passphrase): [Type a passphrase]
Enter same passphrase again: [Type passphrase again]
In case you deviate from the default name, you need to make your ssh-agent aware of it by executing:
ssh-add ~/Path/To/Your/PrivateKey
Modifying existing SSH Keys
If you already have an SSH key pair, you can change the comment as follows, for example, to add the HPCGATE,HPCLOGIN string if you have forgotten to append it:
ssh-keygen -c -C "HPCGATE,HPCLOGIN" -f ~/Path/To/Your/PrivateKey
Generating SSH Keys on Windows
Here we provide information on how to create SSH keys on Windows with different tools.
Launch a new PowerShell, preferably with admin privileges.
Check if
OpenSSHis installed on your system.ssh -vFollow this guide to install
OpenSSHon Windows if it is not installed.Start the
ssh-agentif it is not running already:Start-Service ssh-agentGo to the
.sshdirectory of your user:cd ~\.ssh\Generate a new SSH key pair with the
ECDSAalgorithm:ssh-keygen -t ecdsa -b 521 -C "HPCGATE,HPCLOGIN"For compatibility reasons make sure to use the ECDSA algorithm. The RSA algorithm used by Windows is old compared to the RSA algorithm used on MOGON. This causes conflicts and prevents a connection from being established.
Then
ssh-keygenasks for a name for the key.Enter a file in which to save the key (/home/you/.ssh/id_rsa): [Press enter]After that you have to specify a passphrase. Do not use an empty passphrase!
Enter passphrase (empty for no passphrase): [Type a passphrase] Enter same passphrase again: [Type passphrase again]Done. You have created an SSH key that will allow you to access MOGON using PowerShell. Upload you public SSH key to your JGU account
Uploading the Public Key
- Browse to account.uni-mainz.de and use your
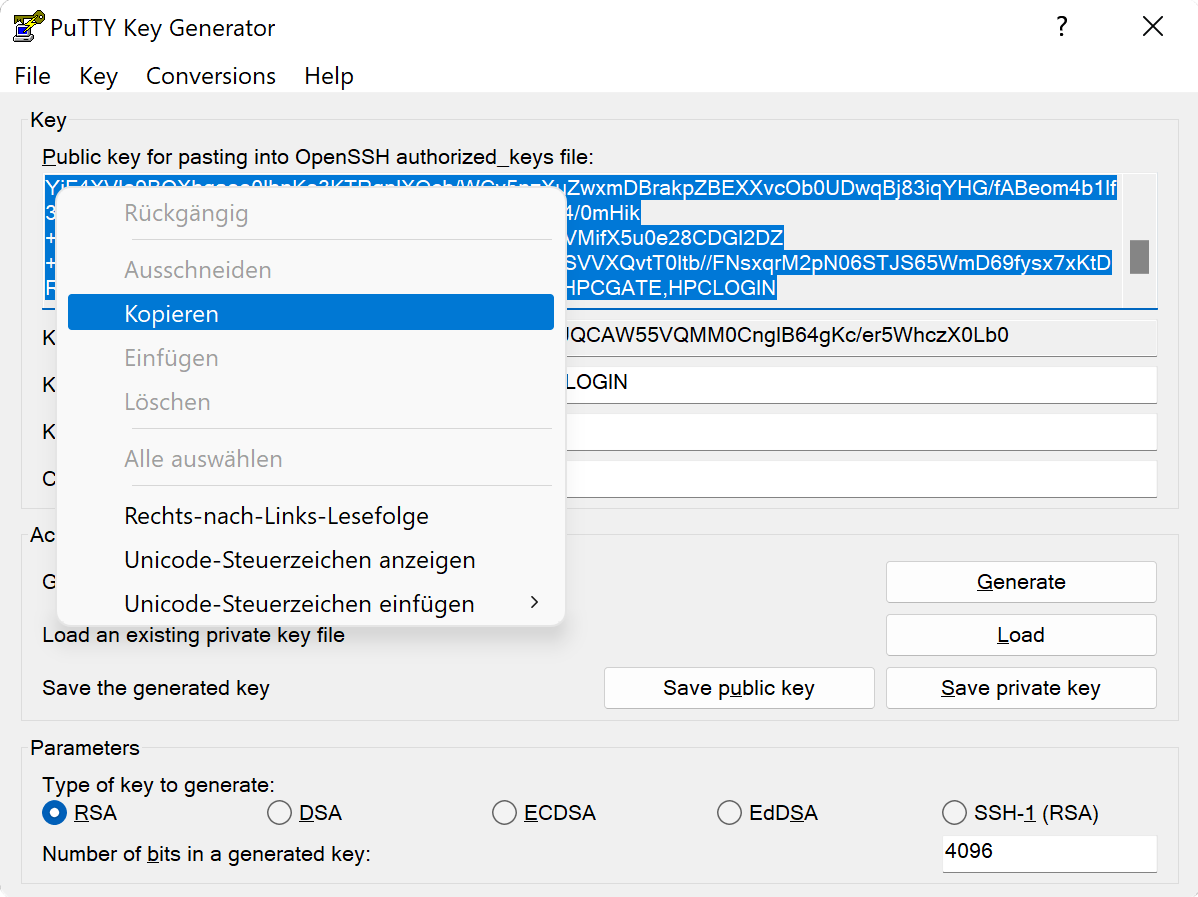
JGU credentialsfor login. - Paste the contents of your public SSH key into the
SSH public keyfield. - You can add further comments in the
Comment or key namefield to help you identify this key again at a later point in time. - Please select
HPCLOGINas thekey usage. - Feel free to leave the duplicate
HPCLOGINas is, or delete it from the public key field. - At last, please click on
Save. - The newly added SSH key should be displayed in the SSH key overview.
Connecting on Linux/macOS
For testing purposes, or if you only need to do this occasionally, you could use this command to connect to the MOGON NHR cluster:
ssh -J <username>@hpcgate.zdv.uni-mainz.de <username>@mogon-nhr-01
or in case you want to access MOGON II:
ssh -J <username>@hpcgate.zdv.uni-mainz.de <username>@mogon
Simply replace <username> with your JGU-username. Instead of mogon, which will distribute users amongst login nodes, you could also supply the MOGON service-node directly, if you want to access a specific login node. An overview of the MOGON service nodes is given here.
You can also explicitly specify the SSH key for the connection:
ssh -i ~/Path/To/Private/Key -J <username>@hpcgate.zdv.uni-mainz.de -i ~/Path/To/Private/Key <username>@mogon
The SSH key for the jump host and the MOGON service node do not necessarily need to be identical. However, the SSH keys must have been added to your JGU account and have the correct properties.
OpenSSH below version 7.3
The ProxyJump option was added in OpenSSH 7.3 and is basically shorthand for the ProxyCommand. For OpenSSH versions below 7.3. you can use the following command:
ssh -o ProxyCommand="ssh -W %h:%p <username>@hpcgate.zdv.uni-mainz.de" <username>@mogon
Simply replace <username> with your JGU-username and <service-node> with the MOGON service-node you want to access. You can find an overview of the MOGON service nodes
here.
ssh -VIf you connect to a new remote location for the first time, you will be asked to confirm the identity of the server you are communicating with.
The authenticity of host 'hpcgate.zdv.uni-mainz.de (2001:4c80:40:63c:4:86ff:fe5d:b22d)' can't be established.
ECDSA key fingerprint is SHA256:pzKsg8DkGkzAxDw2n8Uggk/jbboSpNYi5w47LcXjTxk.
Are you sure you want to continue connecting (yes/no/[fingerprint])? █
You can check the SSH Fingerprints of our service nodes here. Confirm by typing yes or pasting the relevant fingerprint for an automatic verification.
Creating an SSH Configuration File
If you need to login from the outside more often, you can configure your SSH client to perform these steps automagically.
For this purpose, edit your local SSH config (~/.ssh/config) to include the following lines, where the setting ForwardX11 yes is optional:
# MOGON jump host
Host hpcgate
    HostName hpcgate.zdv.uni-mainz.de
    User <username>
    ForwardX11 yes
    IdentityFile ~/Path/To/Private/Key

# for access to MOGON II:
Host mogon
    HostName mogon
    User <username>
    ProxyJump hpcgate
    ForwardX11 yes
    IdentityFile ~/Path/To/Private/Key

# for access to MOGON NHR:
Host mogon-nhr
    HostName mogon-nhr-01
    User <username>
    ProxyJump hpcgate
    ForwardX11 yes
    IdentityFile ~/Path/To/Private/Key
User and IdentityFile options!ssh mogon
for access to a service node on MOGON II, or:
ssh mogon-nhr
to connect with MOGON NHR.
(More information on the jumphost technique with ProxyCommand here)
Config for OpenSSH below version 7.3
# MOGON jump host
Host hpcgate
    HostName hpcgate.zdv.uni-mainz.de
    User <username>
    IdentityFile ~/Path/To/Private/Key

# for access to MOGON:
Host mogon
    HostName mogon
    User <username>
    IdentityFile ~/Path/To/Private/Key
    ProxyCommand ssh -W %h:%p hpcgate

# for access to MOGON NHR:
Host mogon-nhr
    HostName mogon-nhr-01
    User <username>
    ProxyJump hpcgate
    IdentityFile ~/Path/To/Private/Key
    ProxyCommand ssh -W %h:%p hpcgate
Using X11-forwarding on MacOS
In order to use the X11-forwarding, an X11-server should be installed on your system.
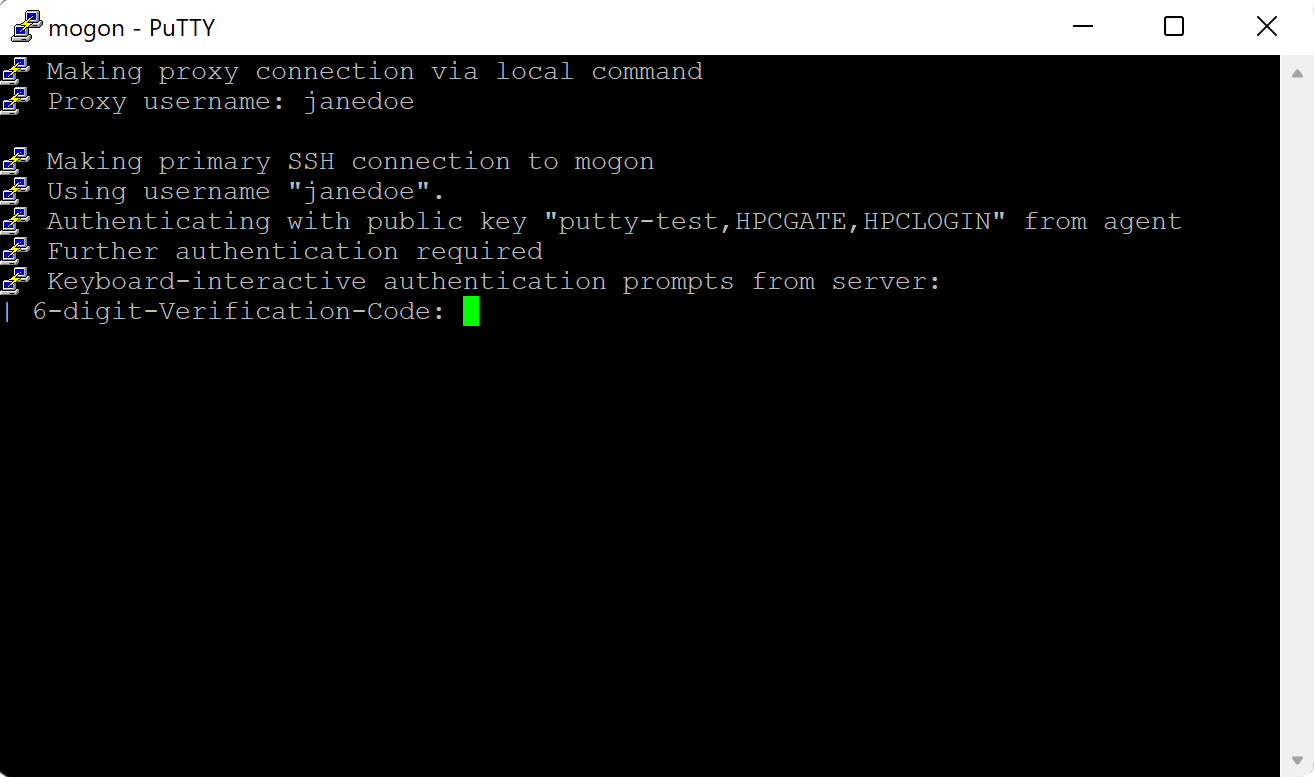
Successful Connection Attempt
If your SSH setup is correct and enough time has passed for your uploaded public key to be spread throughout our system, a successful connection attempt is going to end with the prompt for your privacyIDEA password.
ssh mogon
6-digit-Verification-Code: █
You have to complete the next step of the onboarding procedure first before you can proceed (setup of a mobile authenticator).
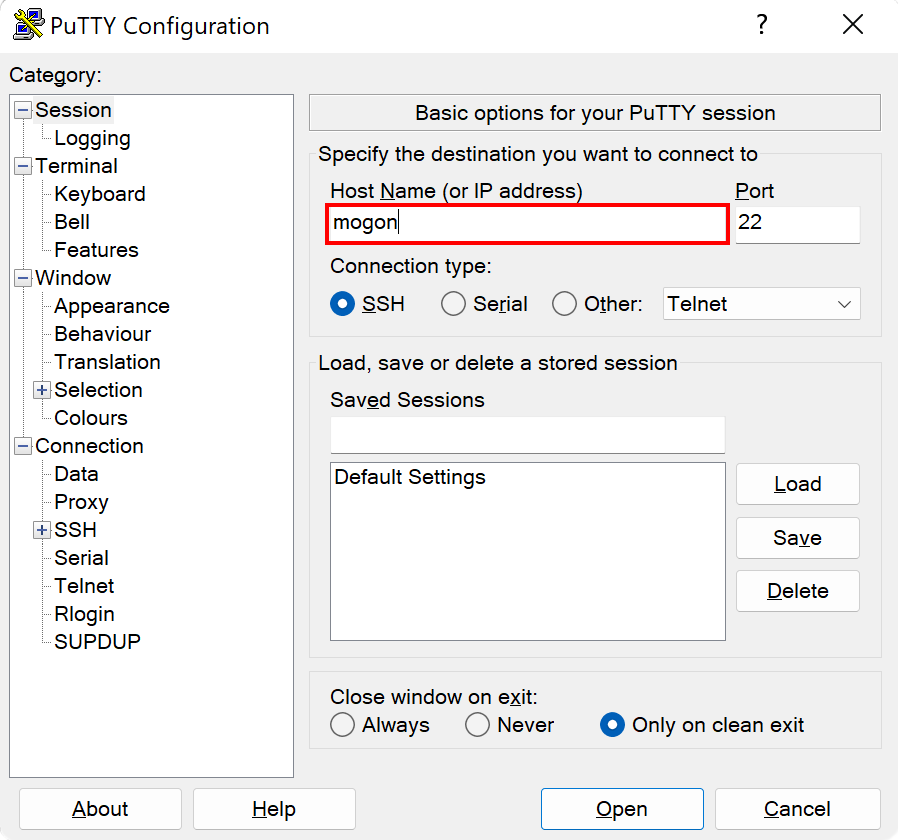
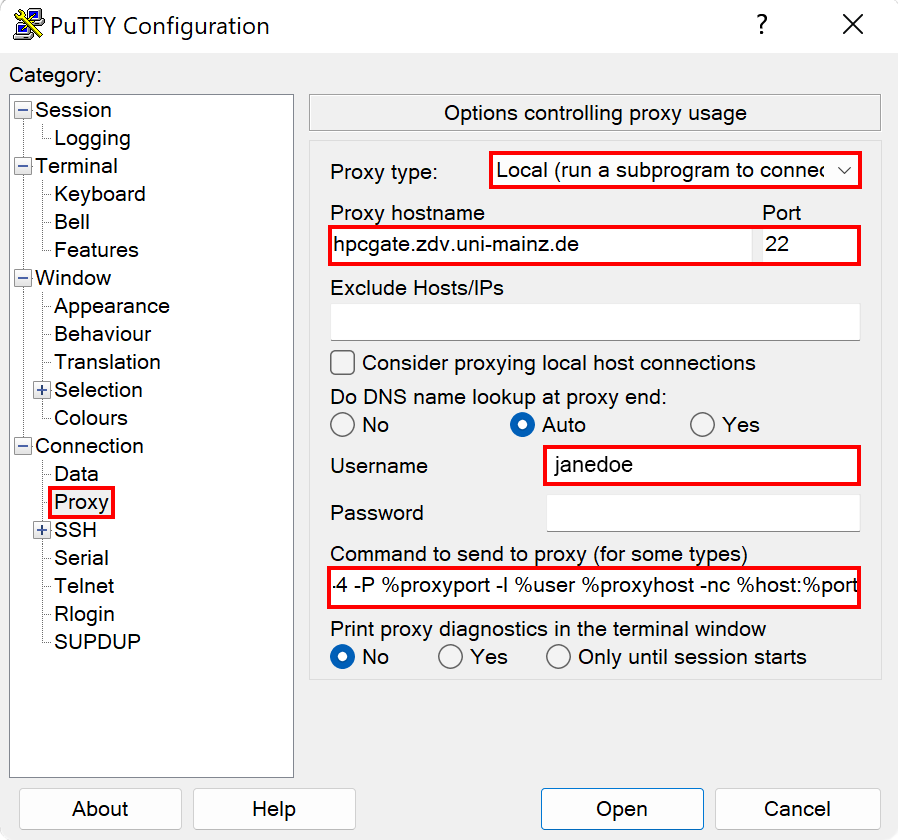
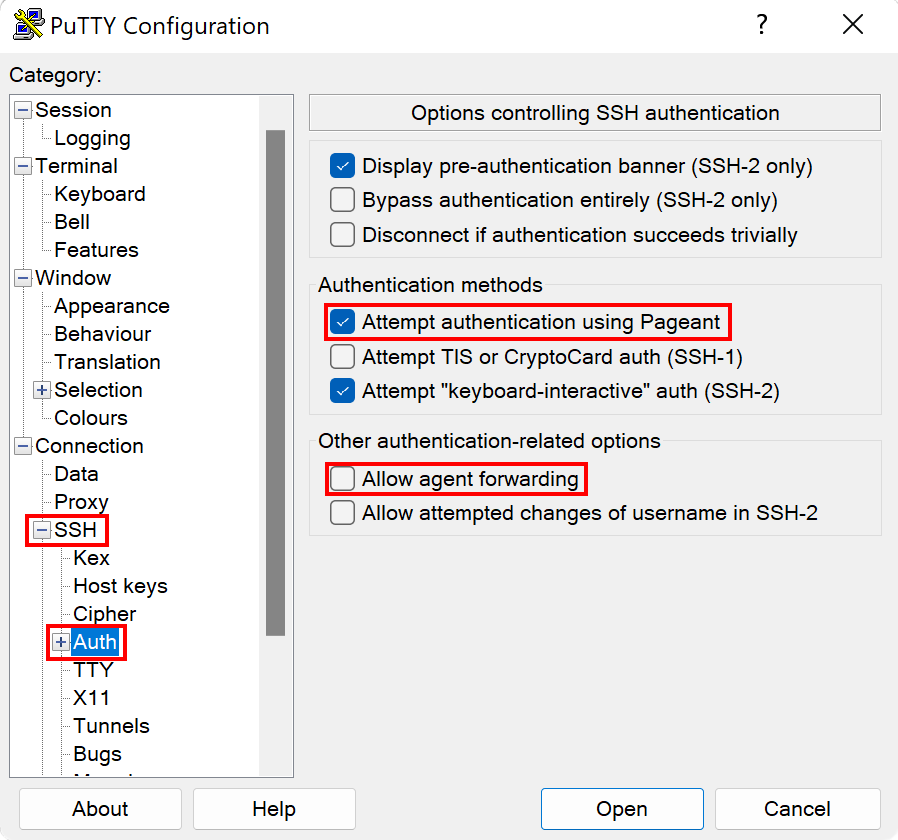
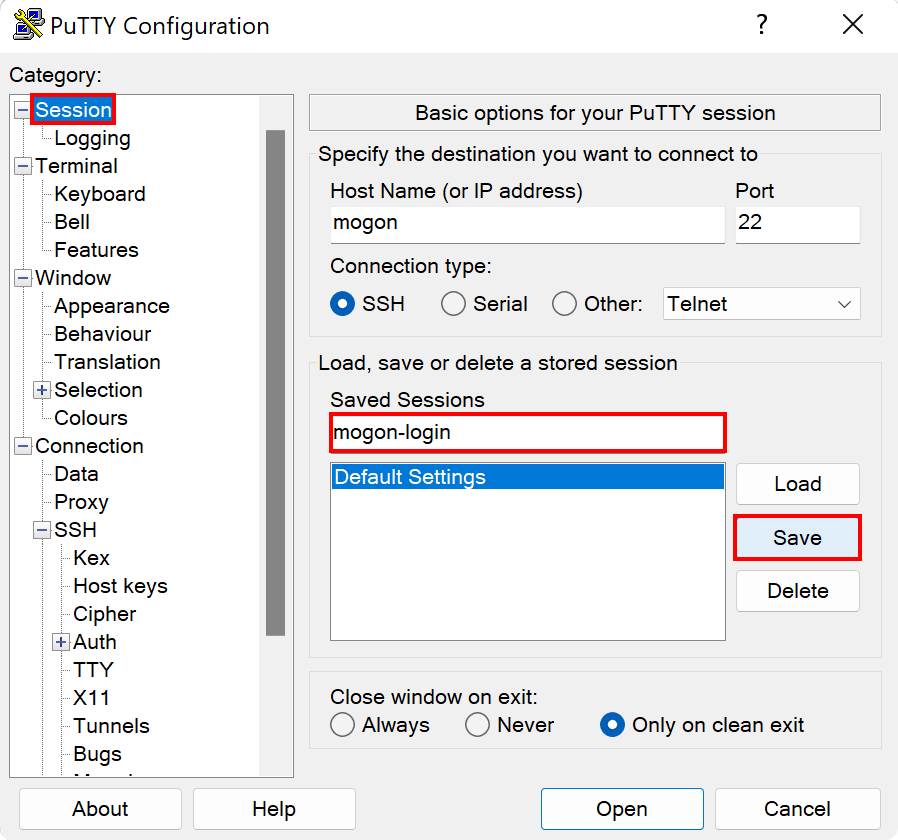
Connecting on Windows
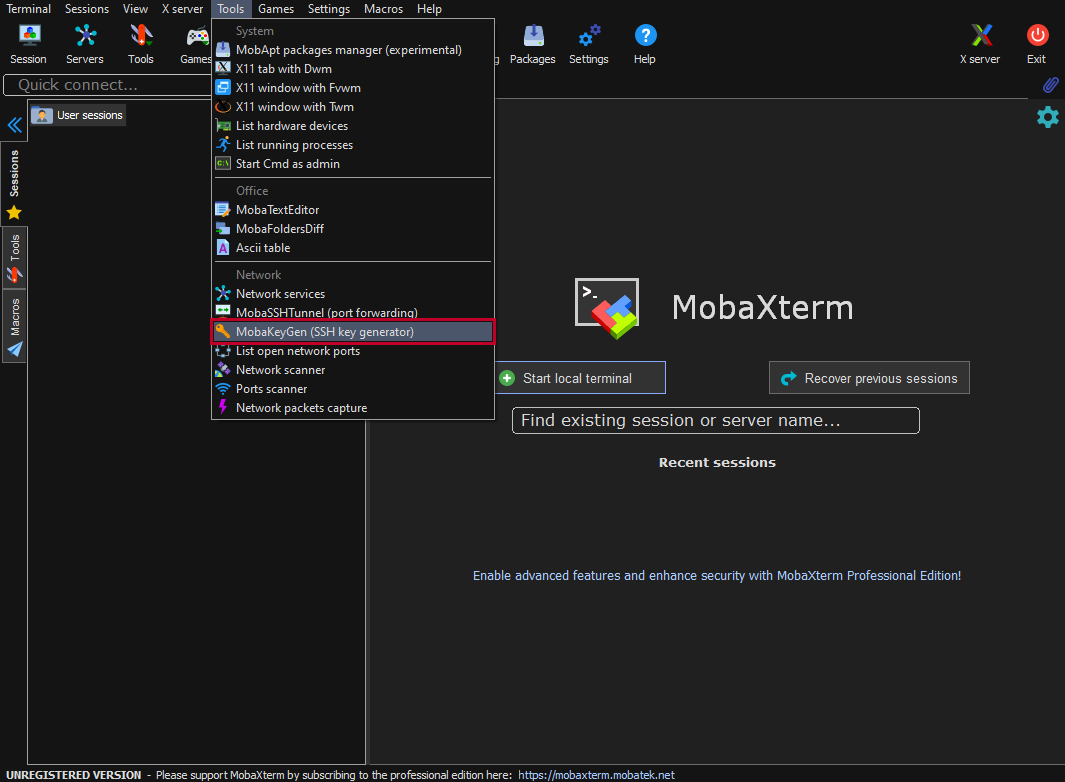
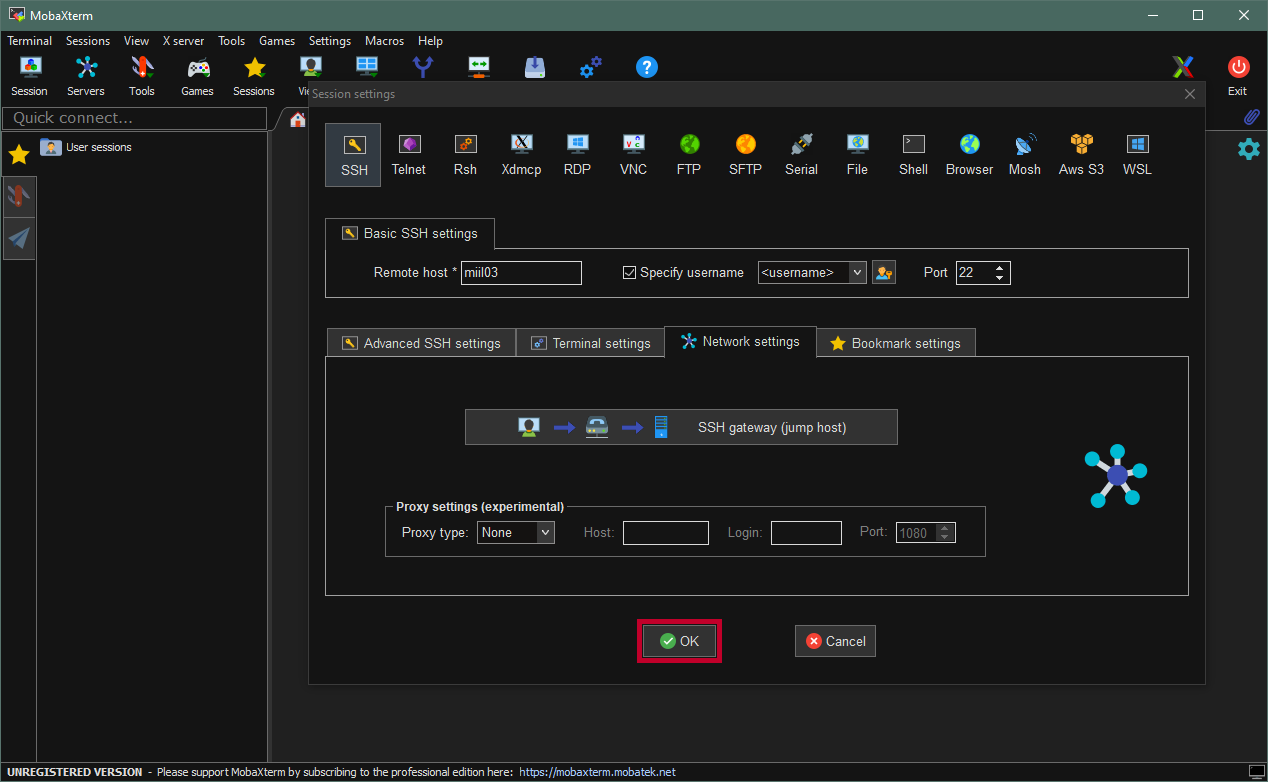
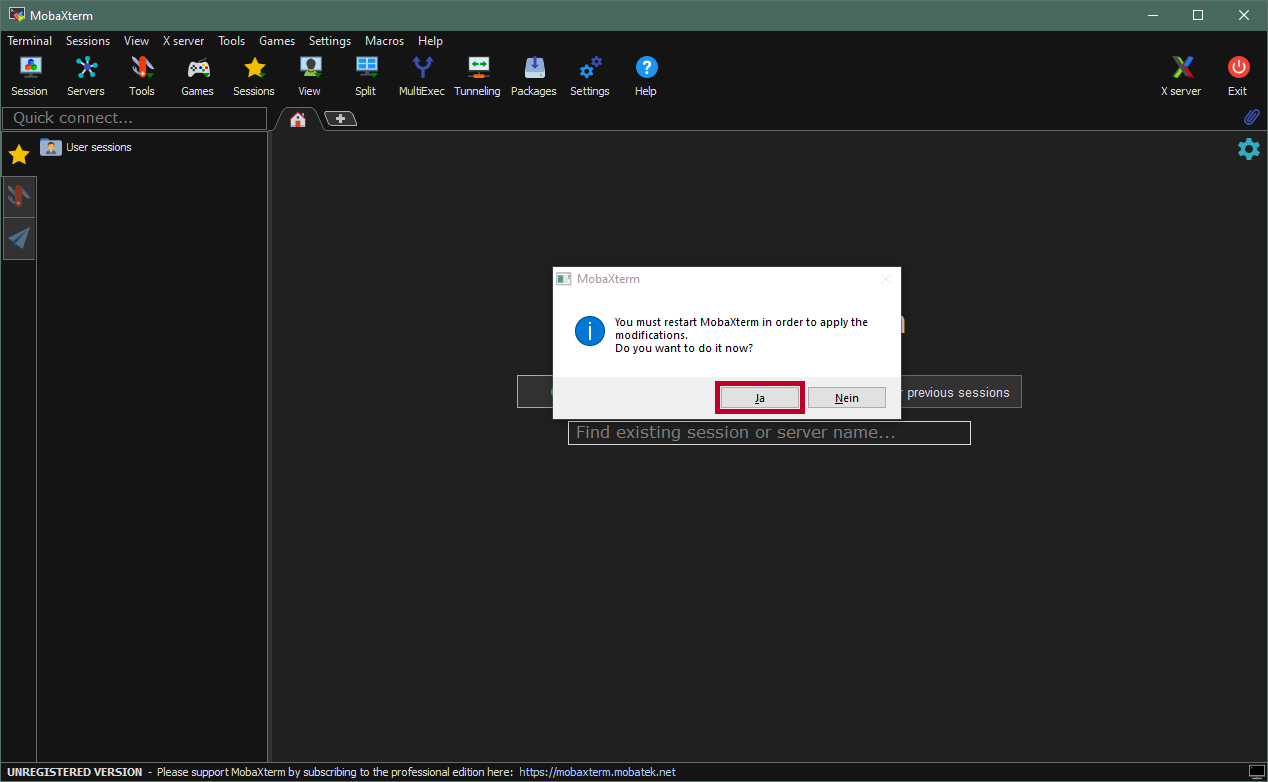
We advice Windows user to use the portable version of MobaXterm to connect to MOGON. It’s reliable, does not need to be installed and is more intuitive for users who only used windows before.
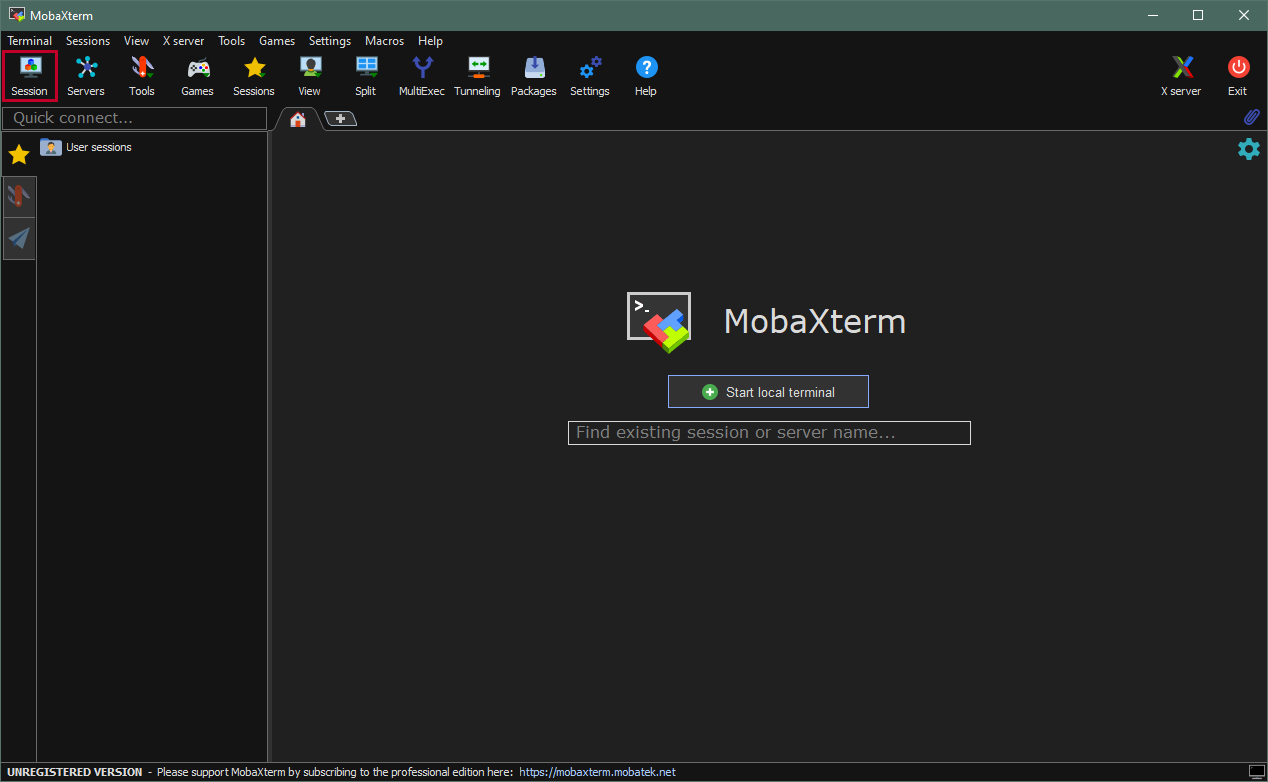
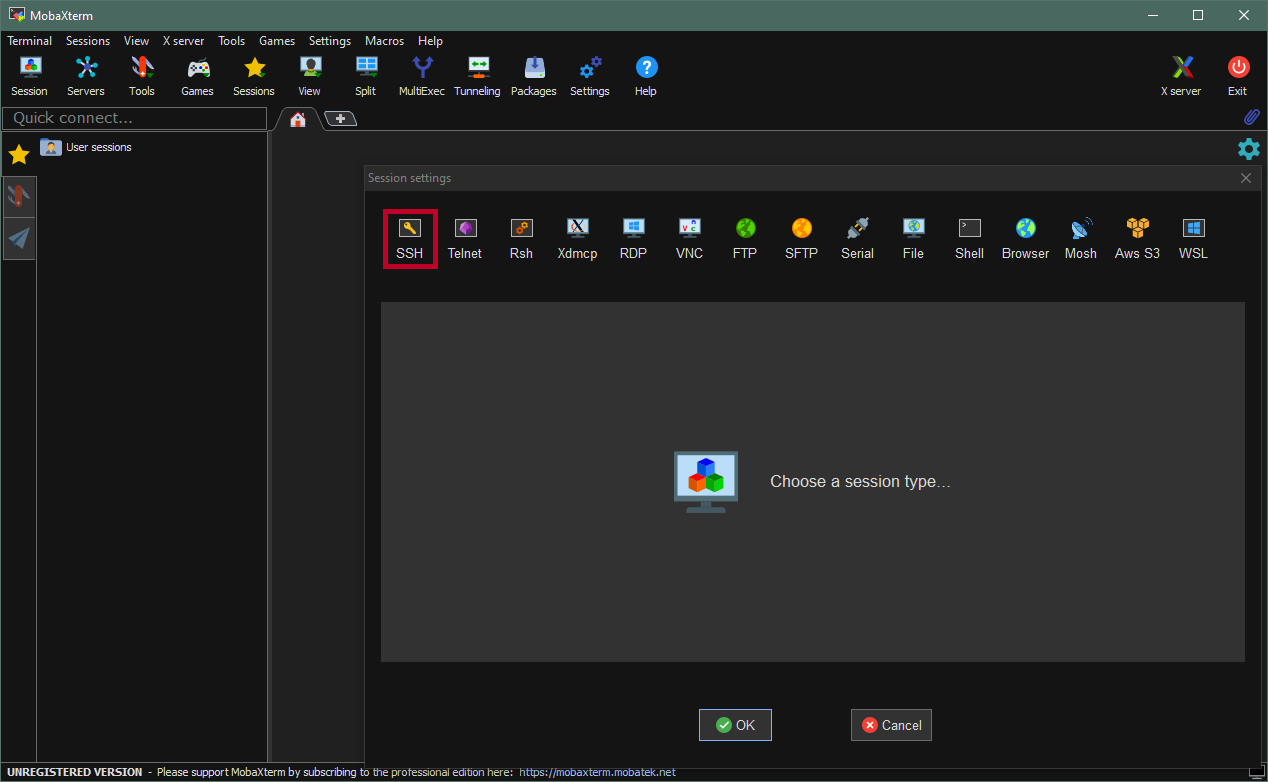
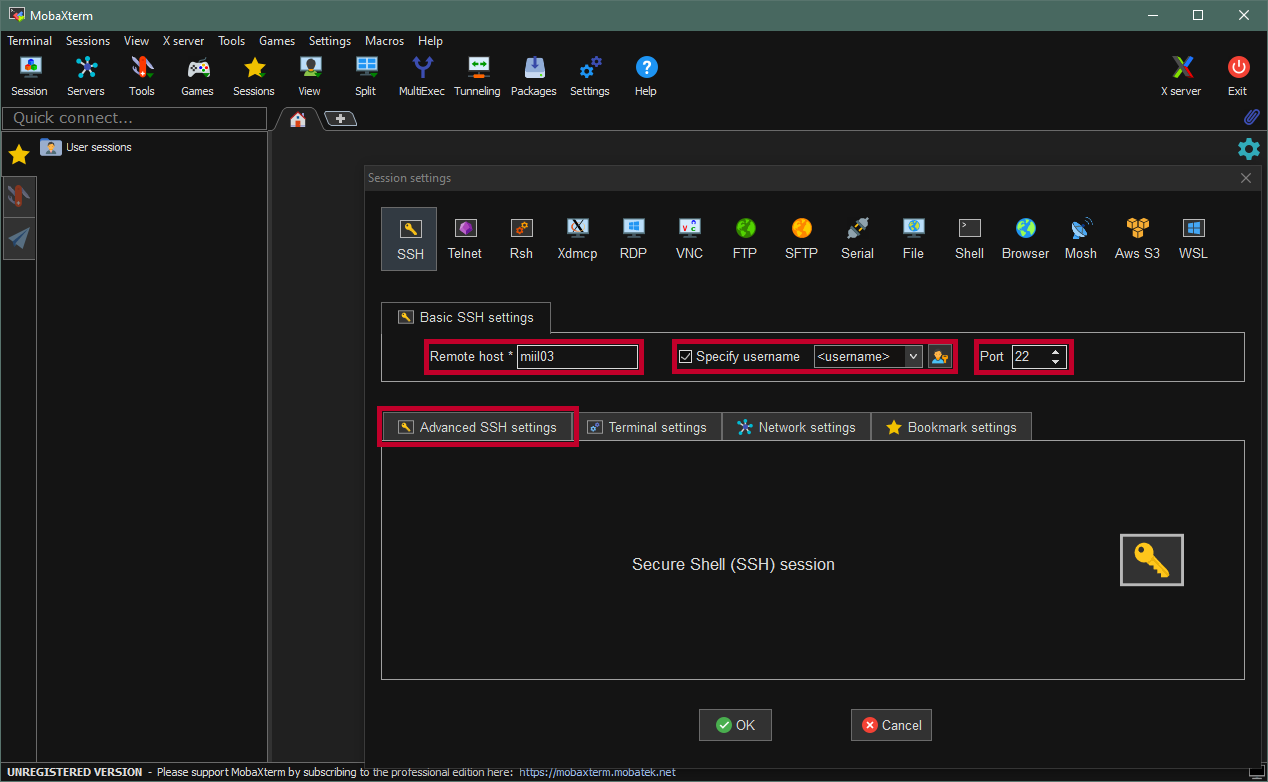
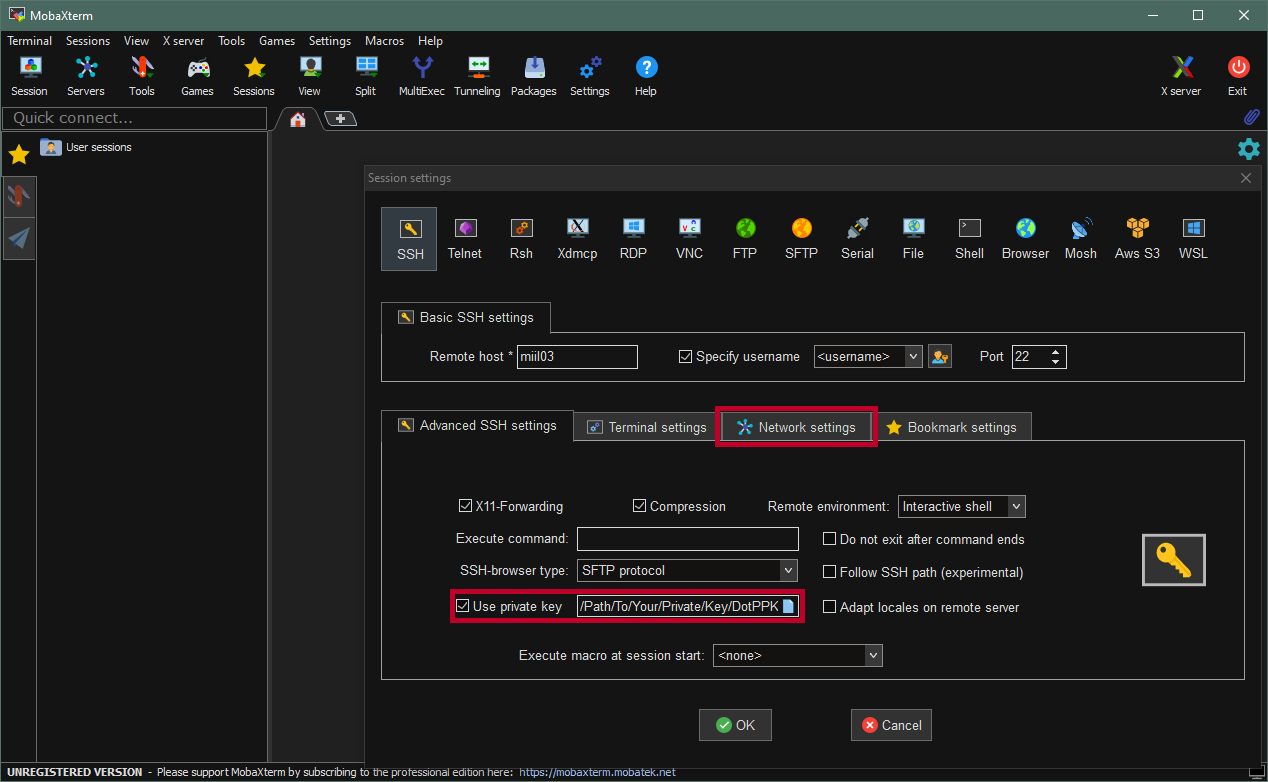
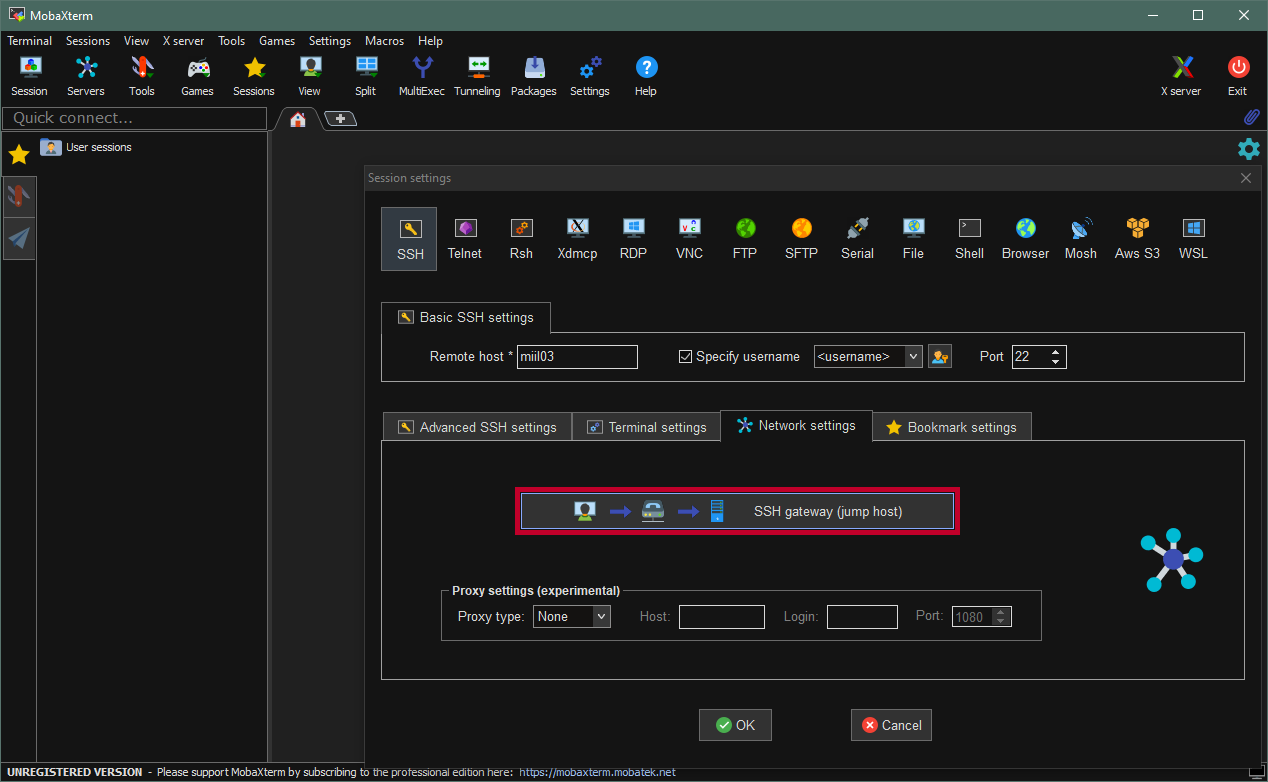
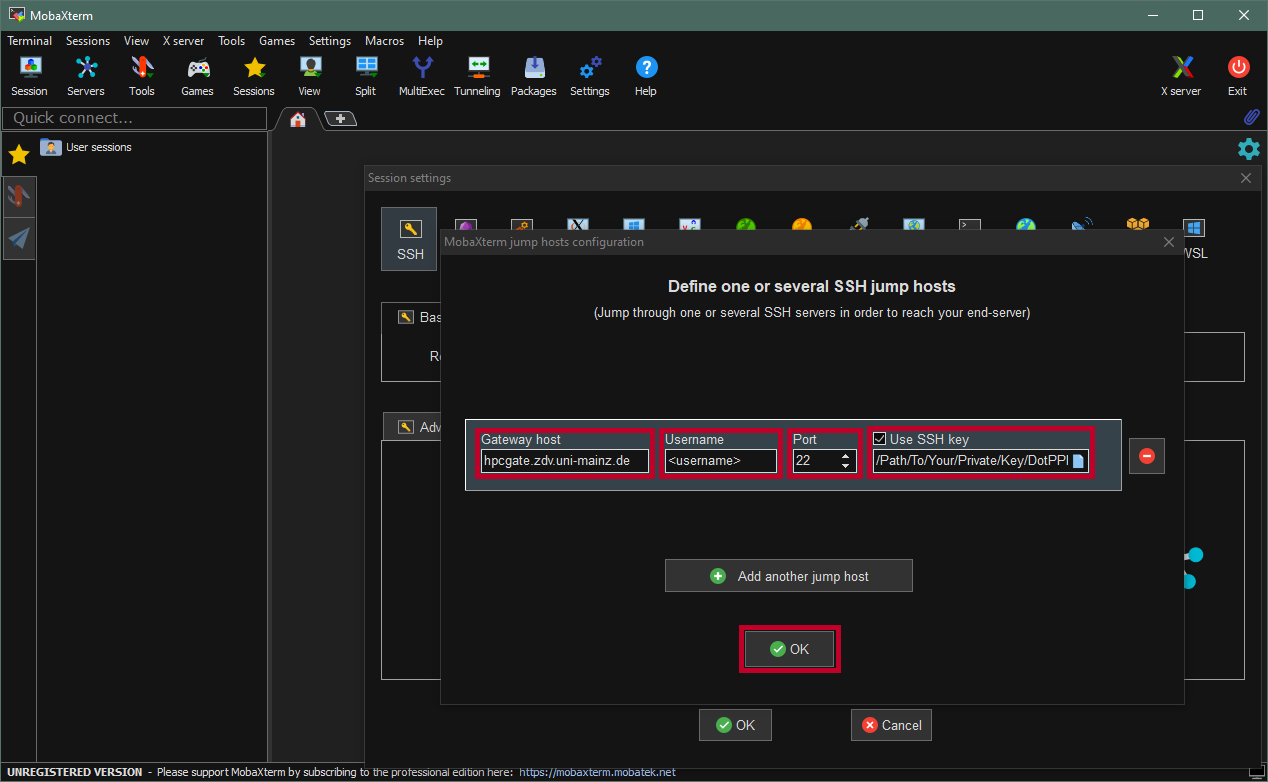
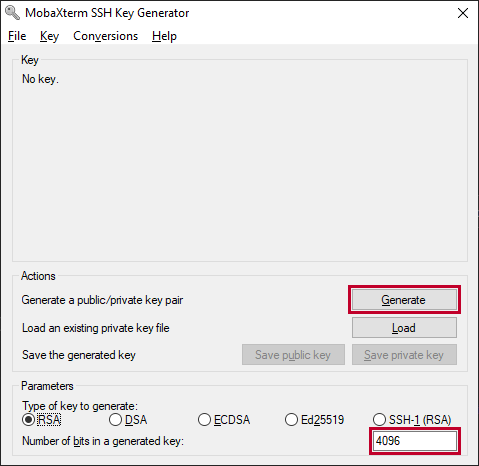
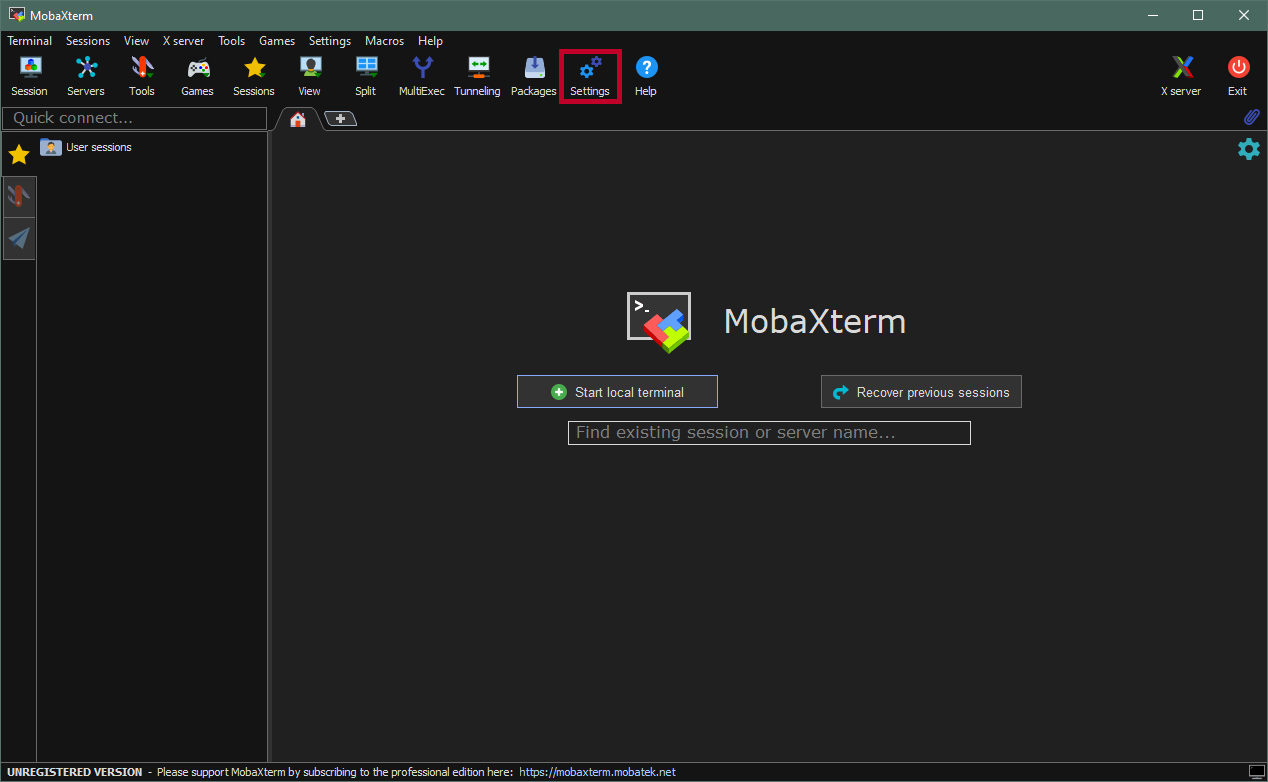
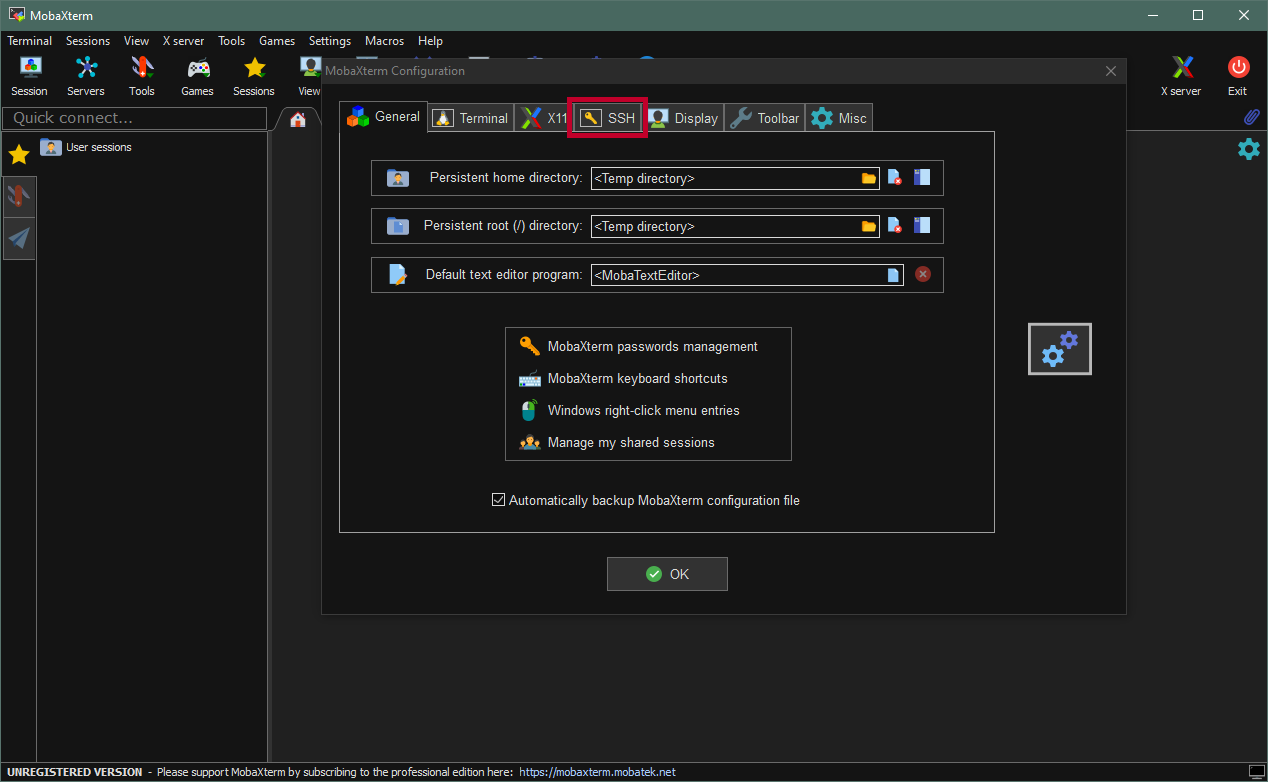
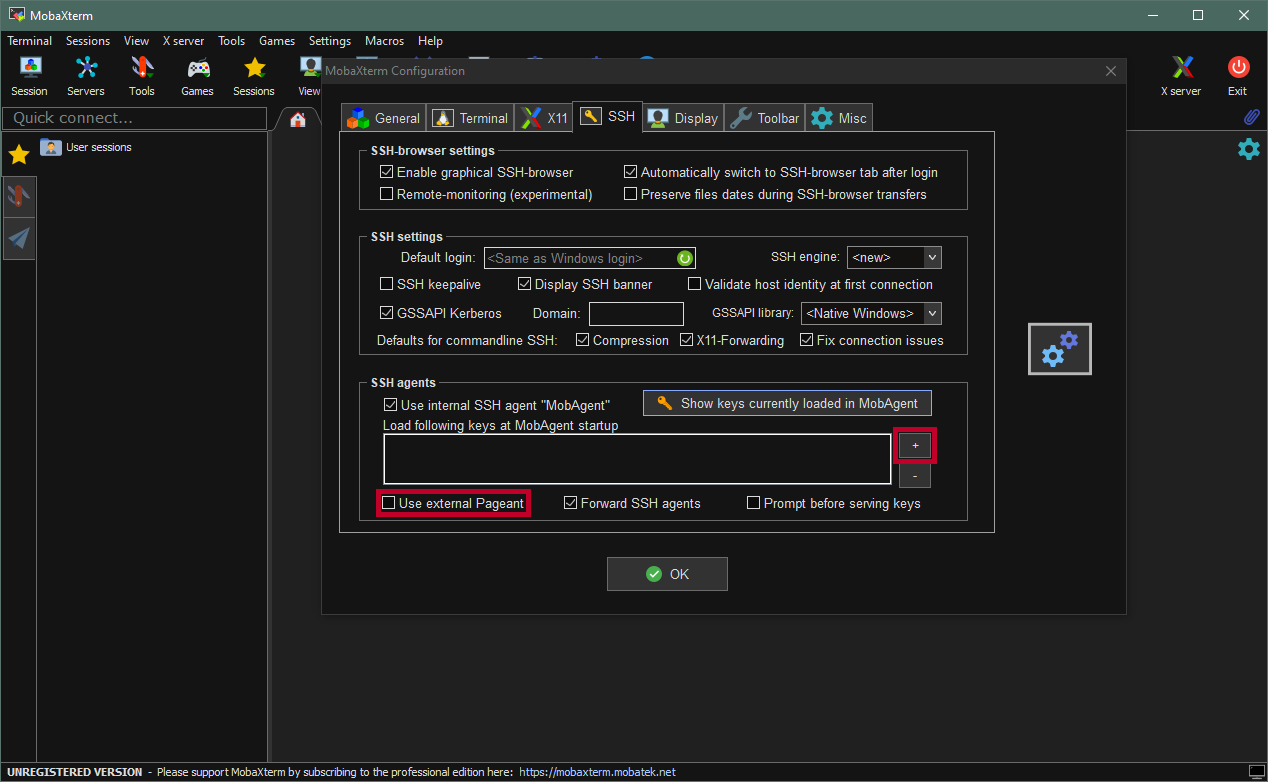
Using the MobaXterm SSH agent


Open Windows PowerShell. Press the key, type
PowerShelland hit enter.Check if
OpenSSHis installed on your system:ssh -VYou should get an output similar to that shown below
OpenSSH_for_Windows_7.7p1, LibreSSL 2.6.5This tutorial was created with the
OpenSSH versionshown above andPowerShell 7.0.2.Verify that the
ssh-agentis running:Get-Service ssh-agentIf the
shh-agentis not running, start it with:Start-Service ssh-agentTo have
ssh-agentautomatically start with windows, you can execute (from elevated prompt):Set-Service ssh-agent -StartupType AutomaticGo to
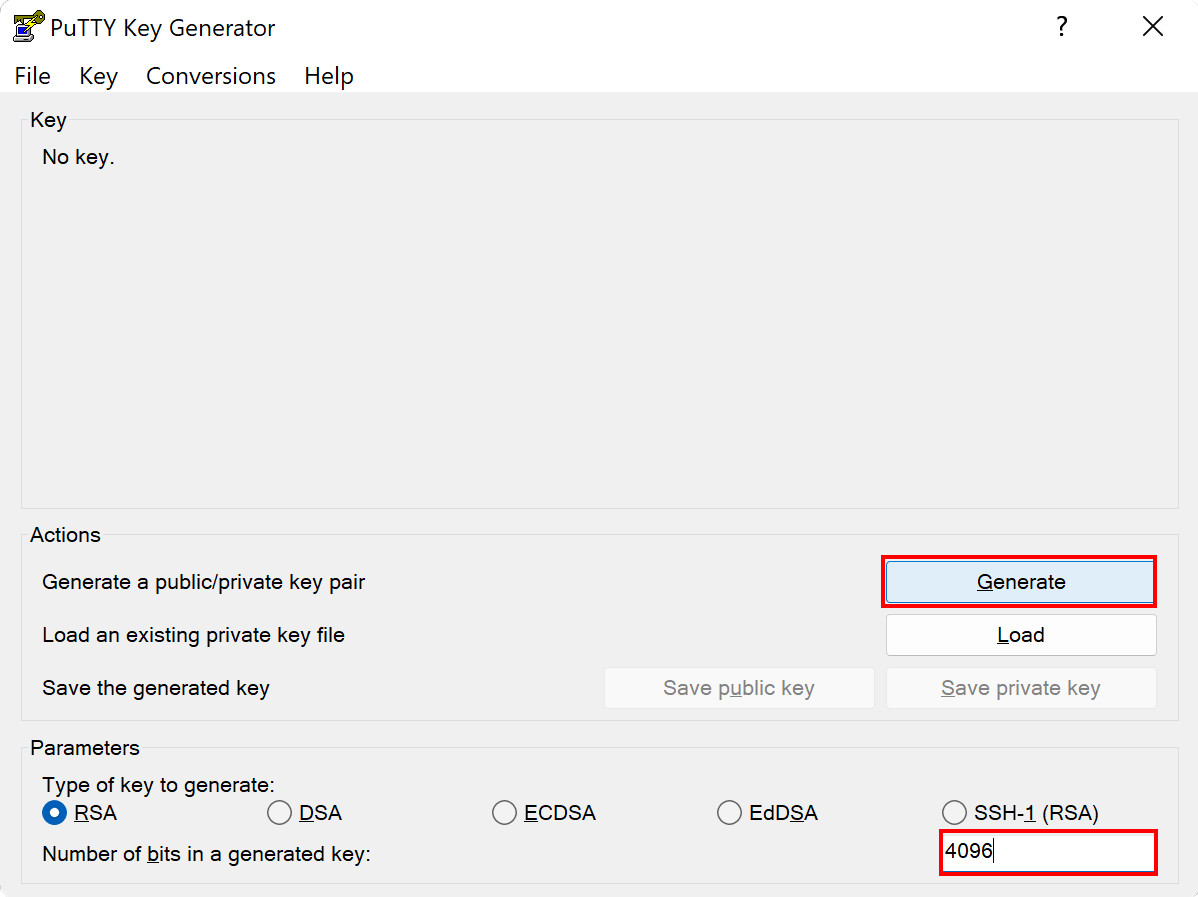
.sshin your home directory:cd ~/.sshGenerate a new SSH key pair with the
ECDSAalgorithm:ssh-keygen -t ecdsa -b 521 -C "HPCGATE,HPCLOGIN"For compatibility reasons make sure to use the
ECDSAalgorithm. TheRSAalgorithm used by Windows is old compared to theRSAalgorithm used on MOGON. This causes conflicts and prevents a connection from being established.Then
ssh-keygenasks for a name for the key.Enter a file in which to save the key (/home/you/.ssh/id_rsa): [Press enter]After that you have to specify a passphrase - Do not use an empty passphrase!
Enter passphrase (empty for no passphrase): [Type a passphrase]
Enter same passphrase again: [Type passphrase again]
Upload your public SSH-Key to account.uni-mainz.de
Add your new SSH key to the
ssh-agent.ssh-add <YourNewPrivateKey>Be sure to specify the correct path to the SSH key or go to the directory of the key before executing the command.
Verify that the
ssh-agentutilizes the SSH keyssh-add -lCreate the following file
.ssh/configwith an editor and add the following lines:# MOGON jump host Host hpcgate User <username> Hostname hpcgate.zdv.uni-mainz.de Port 22 IdentityFile C:/Users/<username>/.ssh/<YourPrivateKey> # for access to MOGON: Host mogon HostName miil03.zdv.uni-mainz.de User <username> Port 22 IdentityFile C:/Users/<username>/.ssh/<YourPrivateKey> ProxyCommand ssh.exe -W %h:%p -q hpcgate # for access to MOGON NHR: Host mogon-nhr HostName mogon-nhr-01 User <username> ProxyJump hpcgate IdentityFile C:/Users/<username>/.ssh/<YourPrivateKey> ProxyCommand ssh.exe -W %h:%p -q hpcgateThe path to your
IdentitiyFilemay be different. Please make sure the path is correct before you save the file.Start a new Session to a MOGON service node. For example, you can now simply use:
ssh mogonto access MOGON 2, or
ssh mogon-nhrif you want to access MOGON NHR or MOGON KI
Done. You should now be able to log in to the various MOGON service nodes. You can add each login node to your
~/.ssh/configfile. A list of MOGON Service Nodes can be found here.
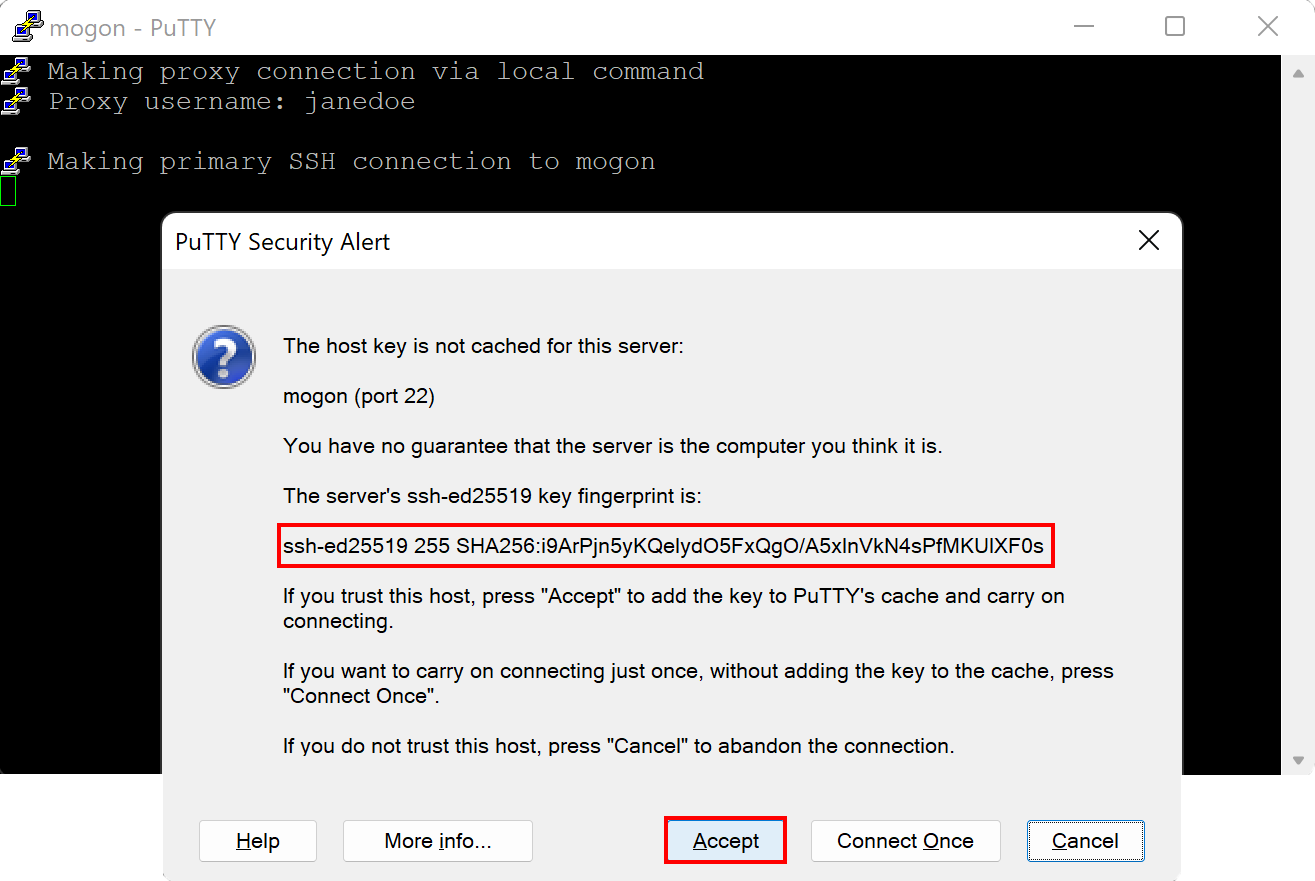
SSH Fingerprints
On establishing a connection for the first time, you will be asked to confirm the identity of the server you are communicating with. Please compare indicated fingerprints to the ones listed below.
| Cipher | Hash | Fingerprint |
|---|---|---|
| RSA | MD5 SHA256 | 92:8b:0d:af:53:27:09:b9:c0:13:a5:7c:47:5f:18:105/h9wmWi44ViIpMm1I/7Ox/vXZ/JYR2tM3QJ7QbFNDA |
| ECDSA | MD5 SHA256 | e9:d9:54:5d:a3:ba:0e:d5:ce:e5:02:c0:70:8e:05:d2pzKsg8DkGkzAxDw2n8Uggk/jbboSpNYi5w47LcXjTxk |
| ED25519 | MD5 SHA256 | 63:67:65:76:5f:ad:fb:20:f2:68:92:cf:d5:49:2c:dcCNbkj04hEuJ9IwgGkTBXbF1WtE/Nb46kPVSejKUGfRU |
| Cipher | Hash | Fingerprint |
|---|---|---|
| RSA | MD5 SHA256 | 39:38:c3:a0:3b:a4:7b:13:03:88:70:35:ca:3c:bd:48MFyTochFLM9iue2D6qWreoQaJrtXITqyvAcXMQuI/ck |
| ECDSA | MD5 SHA256 | da:e8:86:93:88:99:44:a5:1a:fb:5d:43:00:23:cc:084j1nbNKmElz7QbAkMokyoKPLAIjB7V4GVqJITObiFYA |
| ED25519 | MD5 SHA256 | 68:e5:29:01:18:93:de:f4:0e:e0:54:48:1e:10:ed:51i9ArPjn5yKQeIydO5FxQgO/A5xlnVkN4sPfMKUlXF0s |
| Cipher | Hash | Fingerprint |
|---|---|---|
| RSA | MD5 SHA256 | 23:fc:f8:0d:5c:5b:f4:c2:5b:93:c0:a3:6a:2c:c5:a7tSQKQ05IAPWTj0MKyZzSAqDAtotjWkCWr2s3XtvTiS0 |
| ECDSA | MD5 SHA256 | fd:94:b7:64:15:e4:e9:64:b4:96:87:1f:64:b9:06:f2nncHWMQPjZyzupZ7sAdNDSJpqB12Fl4DXoyq4s474ss |
| ED25519 | MD5 SHA256 | 7f:a1:4c:5b:4e:47:ad:76:8c:be:63:c2:90:e5:aa:da9leujhC1P8sOaWTEMF+eS8wldofFt15jrFp7sq+XIB0 |